Garantierte Lieferung für alle Websites
Google Analytics is a free yet powerful web analysis tool that is used to track and report website traffic. Google Analytics was initially launched in 2015 and GA4 is the 4th iteration released in 2019 which includes application and web property. It tracks activities and provides statistics of the activities being performed on the website such as views of the page, duration of the stay, pages per session, and bounce rate of the individuals. It also reports the source of the interaction through which the website is being visited.
While adding users in GA, there exists three options/levels to grant access, which is as follows:
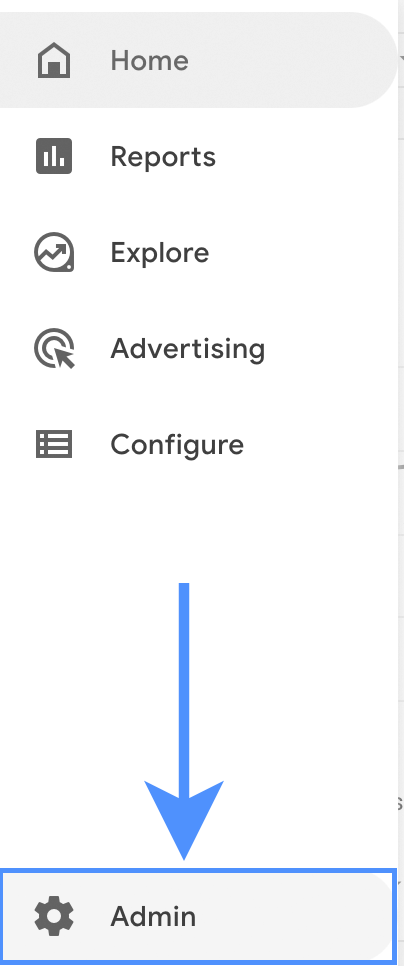
First of all, you must be an administrator to add, delete or modify users in the GA. Following are the steps for adding users in Google Analytics:
Step 1: Log in to your Google Analytics account.
Step 2: Select the admin tab and navigate to the desired level of access (Account/Property/View).
Step 3: Click ‘Access Management’ keeping in view the level of access (Account/Property/View).
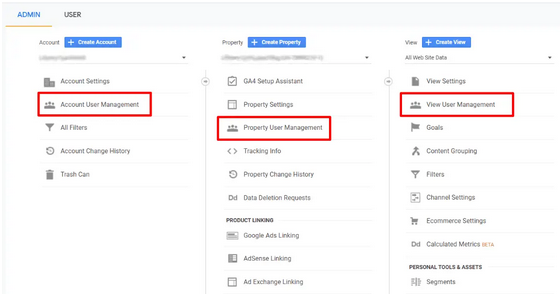
Step 4: Now, click the ‘+’ icon present at the top right corner of the window and click ‘Add Users’.


Step 5: Type the email address of your Google account.
Step 6: Now, select one option from the five direct roles of user permissions (Administrator/Editor/Analyst/Viewer or None) and check mark data restrictions according to your requirements.

Step 7: If you want users to be informed through email, you can select ‘Notify this user by email’.
Step 8: Click ‘Add’ to complete the process.
New users can be given specific roles and controls. At step 6, five direct roles and data restrictions are mentioned which are used to allow certain users to view, modify or create new data reports. The detailed explanation is as follows:
